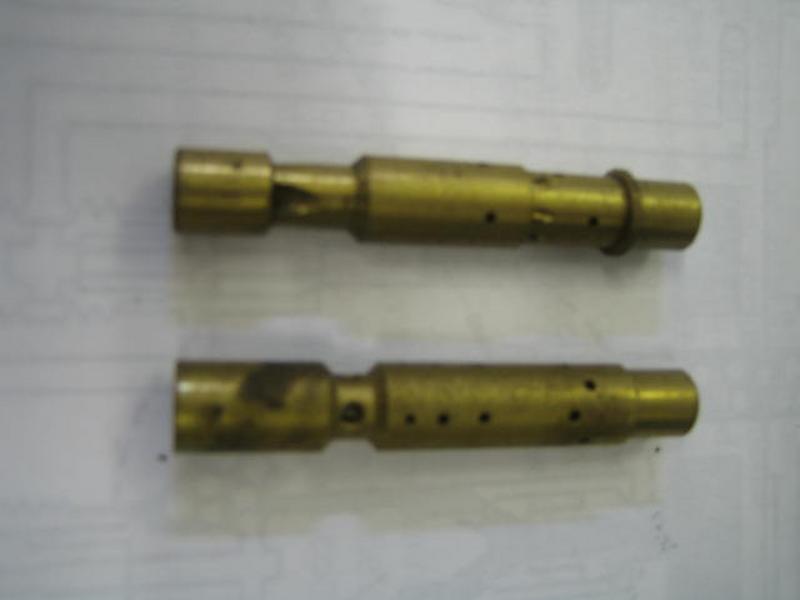
emulsion tubes (12), note, the fuel is drawn in on the left and air on the right
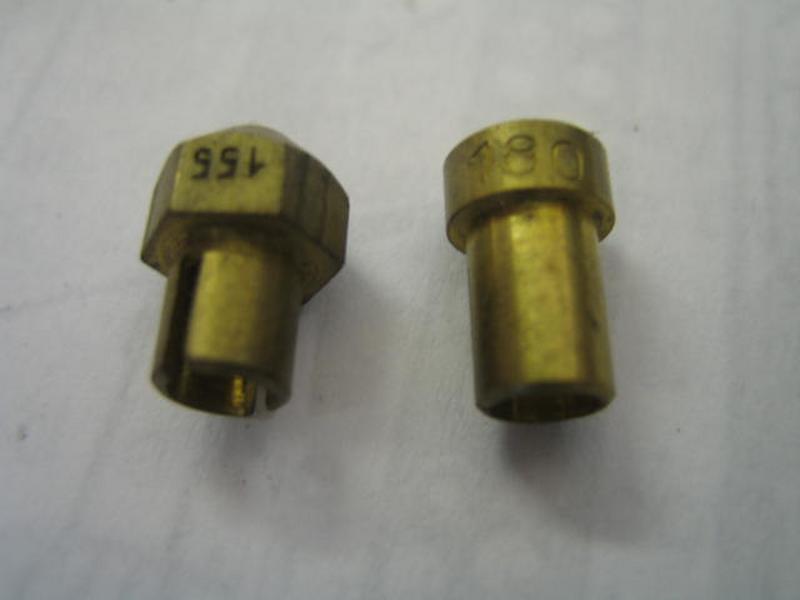
Main Jet (5)and air corrector (11)
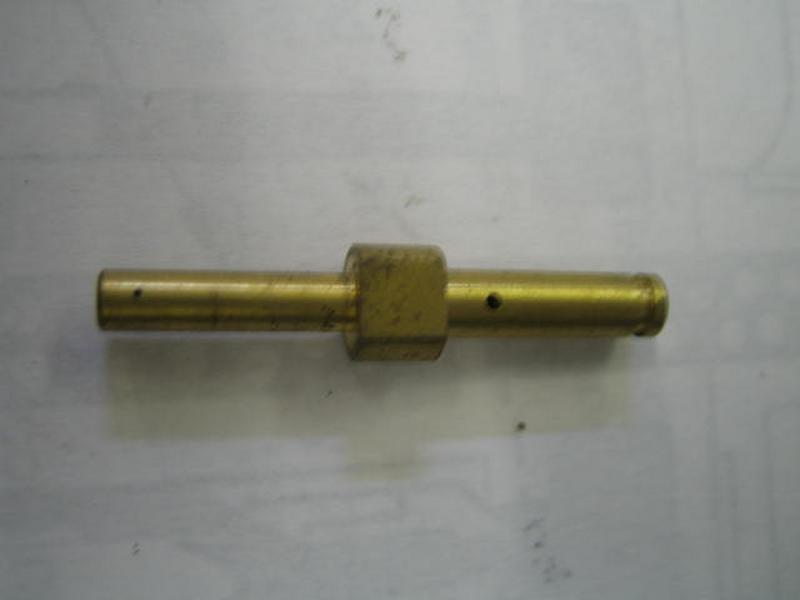
Accelerator pump jet (13)
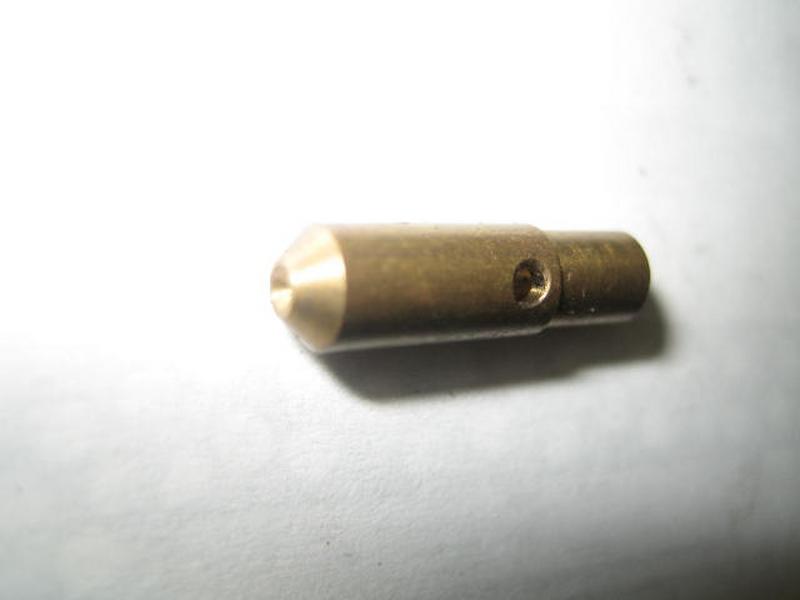
Progression Jet (16)
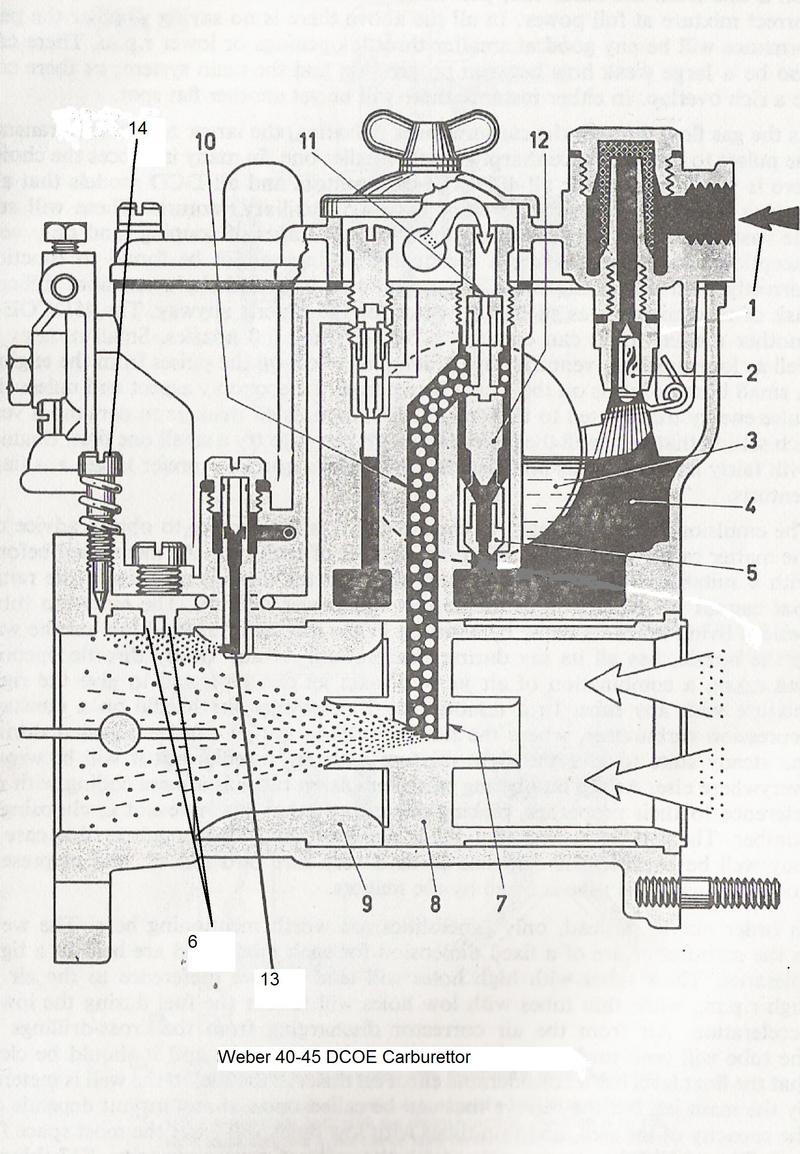
Sectional drawing of Weber 40 DCOE
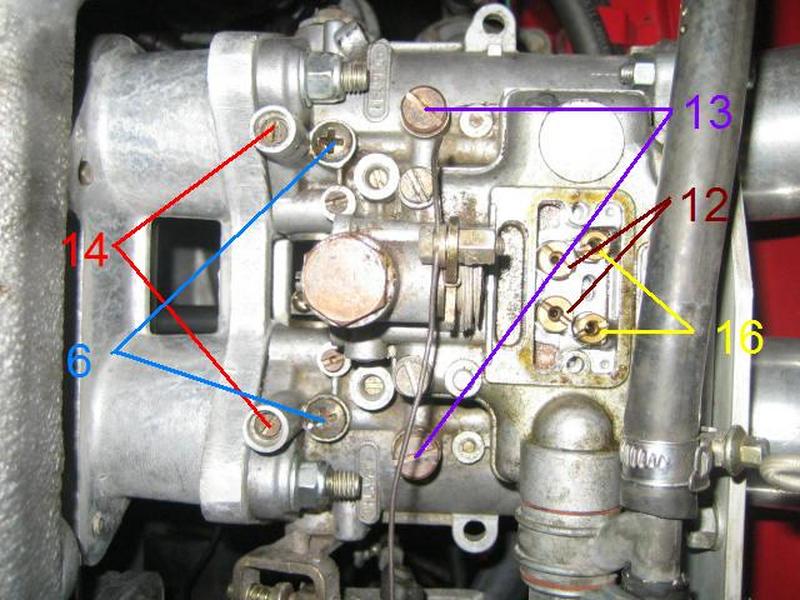
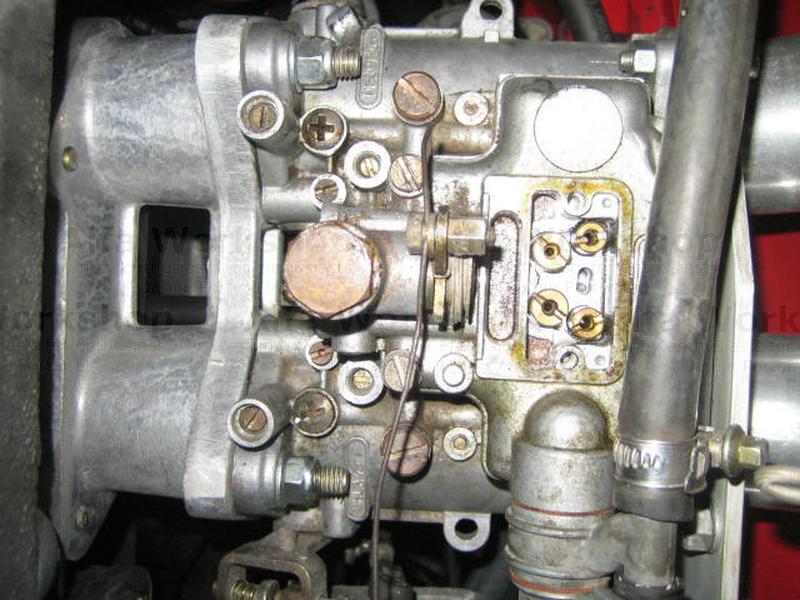
Top View of a Dellorto carb
Carburettors, a guide
So how does a carburettor work? I find it easiest to imagine a carburettor initially as four different systems and while I am separating them into black and white in reality these systems overlap and work together. The four systems are idling, progression, main and accelerator and I will deal with these systems separately starting with the main fuel supply system. This system works on vacuum, the air is drawn through a venturi (9) (constriction) and this accelerates the air causing a vacuum this is explained by Bernoulli's Principle which tells us that as fluid flows more quickly through a narrower cross-section, the pressure decreases, into this vacuum the carb manufacturers put a pipe (7), down which is sucked an emulsion of fuel and air to add to the air which is already being sucked through the carburettors main venturi. Making this mixture or emulsion is the trick bit of the carb, if you can imagine a pipe (12) with a hole in the top and bottom and then a number of holes around the circumference that is how the emulsion is made, the hole in the bottom (5) is where the fuel is sucked in while the hole in the top (11) is where the air is drawn in. This emulsion is sucked out through the holes around the circumference and down the tube into the venturi. By increasing or decreasing the size of the holes at the top and bottom you can vary the amount of fuel or air going into the tube to change the mixture. While moving the holes around the circumference up or down the tube you can alter the mixture through the range, this is a somewhat simplistic picture but you get the idea.
From here I am going to move on to the idle mixture, which may seem to be a bit odd to start with but it will become clear why as we go on. The amount of fuel sucked into the engine is metered with a screw (14) next to the inlet manifold, clockwise weakens the mixture at idle while anti-clockwise, obviously, makes it richer. The idle screw has a taper on the other end and this simply opens or closes a drilling in the casting. The idle screw is fed with an emulsion of air and fuel, not just fuel, and this comes from the progression jet (16). The progression jet, as the name suggests meters the fuel as you progress from the idle jets to the main jets, as you take the engine off idle and before the vacuum through the carb is strong enough for the main jets to work efficiently, this emulsion is fed into the choke by a number of holes spaced up the inside of the carb (6) so when the throttle butterfly opens it clears each hole allowing the emulsion out of each one, in turn, manufacturers change the spacing, diameter and number of holes in order to change the mixture in this vital area of fuelling. The emulsion of fuel and air is made in the same way as the main fuel system except on a miniature scale, a main fuel jet will have a hole in it around 1.25mm in diameter while in a progression jet this will be around 0.5mm, those of you have taken the little round cover which is held on by a wing nut off on a Weber carb or the square cover held on by two screws on a Dellorto carb will find the top of both sets of emulsion tubes under there, the smaller ones are the progression jets while the larger ones are the main jets.
Now we will move on to the accelerator jets, as you put your foot down the speed of the air in the venturi increases rapidly but the fuel system can't cope as fuel has more mass than air, therefore the mixture weakens off causing a flat spot, in order to counteract that fuel is mechanically forced into the venturi through the accelerator jets (13) by a pump situated under the carb in order to physically richen the mixture and avoid this flat spot.
For everyday tuning, it is important to get all the other parameters right before you try to set up the carburettors, so first, before you go anywhere near the carbs check your tappet clearances and the ignition timing, set them up correctly and then you can start on the carbs. The first job is to check they are working correctly and a road test will show up any flat spots while removing a plug cap will tell you if any cylinders are not performing correctly, this is a job for some properly insulated pliers as you can get a very large electric shock from plug leads. Once you are happy that the carbs are in good condition and are working correctly it is important to balance the carbs first, this can be done using a proprietary vacuum gauge and simply adjust the screw between the carbs until both pull the same amount of vacuum.
Once this is done you can adjust the mixture, simply screw the mixture screw in until the revs drop slightly and then unscrew slowly until the cylinder comes back, then with reference to an exhaust gas analyser you can trim the mixture to get it perfect, Alfa's tend to run best with the CO between 1.5 and 3.0% and around 300 parts per million (ppm) of unburnt hydrocarbons (MOT limits are 3.5% CO and 1200 ppm hydro-carbons). Once this is set up the very last job to do is to adjust the idle speed, this is done on the single screw that is between the carbs.
If you want to go a bit further with the tuning of your carbs there are some simple guidelines to follow, these are not rules and there will be many exceptions to these guidelines. First things first, choose your choke size, on a 2.0l Alfa engine you want around a 36mm choke if you want maximum power at 6000 rpm going up to a 46mm choke if you want to reach 8000 rpm (as they say don't try this at home!).
Once you have decided on a choke move on to the emulsion tubes, the best starting place is the original emulsion tube, then if you want the engine to run richer high up in the rev range choose an emulsion tube with lots of holes at its base, while conversely if you want it to run weaker higher in the rev range make sure the holes are nearer the top, remembering at all times these are only guidelines. Now you have to decide on a main jet and as a rule of thumb for somewhere to start, if you think realistically you will have 165 bhp start with a jet that size and work from there. For the air corrector, it is best to stick around the 200 mark as a start point. Now you have somewhere to start and it is best to have a session on a rolling road in order to move on from here, once you have tied the car down try increasing the main jet size and give the car a run on the rollers, if the power goes up then increase the jet size again, however, if the power drops away go back to your original setting and then down a jet size, always leave the last set of jets you used out rather than filing them away as they are an easy reference point and only ever change one setting at a time. Once you are reasonably happy with the mains you can trim the settings using the air corrector as a rough rule 2.5 to 3 sizes of air corrector have the same effect as one size of main jet, remembering that the air corrector has more effect on the mixture as the revs rise.
Next, we move on to the most important bit, take the car for a drive, what does it feel like is it tractable with no flat spot? remember a car can be made to feel powerful by having no power and then the power coming in with a wallop, this can be very deceptive. Remember also that most cams that are for road use i.e. under 290 degrees duration should be able to pull from around 2000 rpm reasonably cleanly, if not try again keeping this original setting in mind and try a new combination of emulsion tubes and jets. There are some other important effects you may get if you change the camshafts, we have found that if you keep the standard airbox you will get a flat spot at low revs which is caused by a "reflection" of the inlet pulse from the choke next to it, in which case ram tubes are a necessity.
So there you are all you ever need to know about carbs in 1500 words, well almost, well not really at all, we have not touched on float heights, hight speed fuel bleeds or starting devices and all the other hundreds of things a manufacturer tests to get the carbs set up exactly for your car, so remember you are best leaving it standard as the manufacturer spent hundreds of hours getting it right, however, there is much fun to be had if you do decide to tune your car up but be very careful how you go about it.
Numbers in red refer to the cutaway picture and the plan view of a carb on the right