This page:

Repairing the 101 chassis
Our Alfa Romeo Giulia Spider 101 Restoration Project so far:
1. [lnav=Project-101-Giulia-Spider.shtml]Starting Point[elnav]
2. [lnav=Project-101-Giulia-Spider-strip-to-body-shell.shtml]Stripping to body shell[elnav]
3. [lnav=Project-101-Giulia-Spider-repairing-the-sills.shtml]Removal of the sills[elnav]
4. [lnav=Project-101-Giulia-Spider-hole-repair.shtml]Repairing roll over bar holes[elnav]
5. Repairing the chassis (this page)
6. [lnav=Project-101-Giulia-Spider-in-the-metal.shtml]The 101 in the metal[elnav]
7. [lnav=Project-101-Giulia-Spider-painted.shtml]The 101 in paint[elnav]
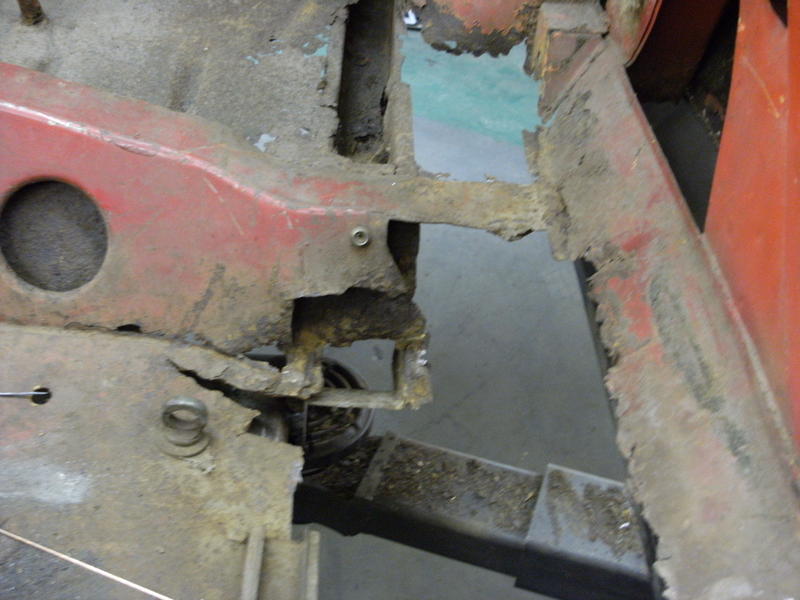
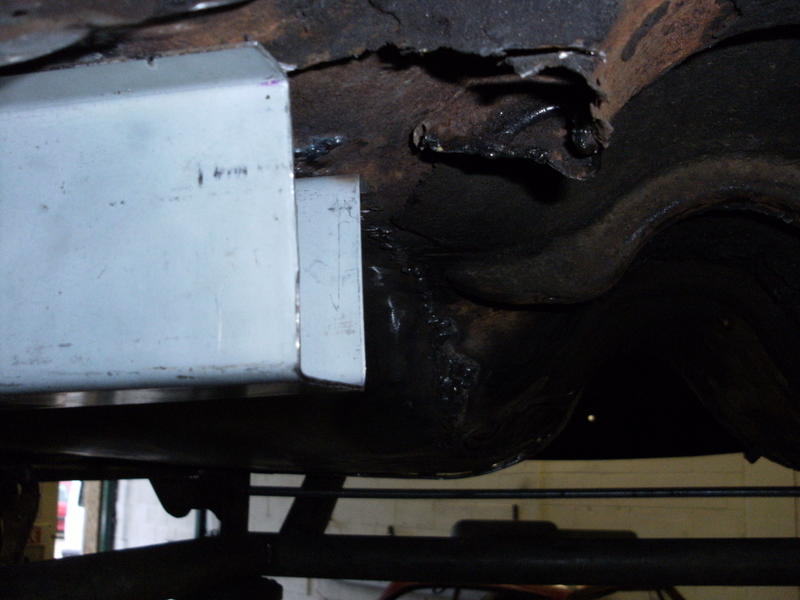 | This repair looks interesting, we are unable to buy this part of the chassis of the shelf and so we are going to have to fabricate it from sheet steel. |
|
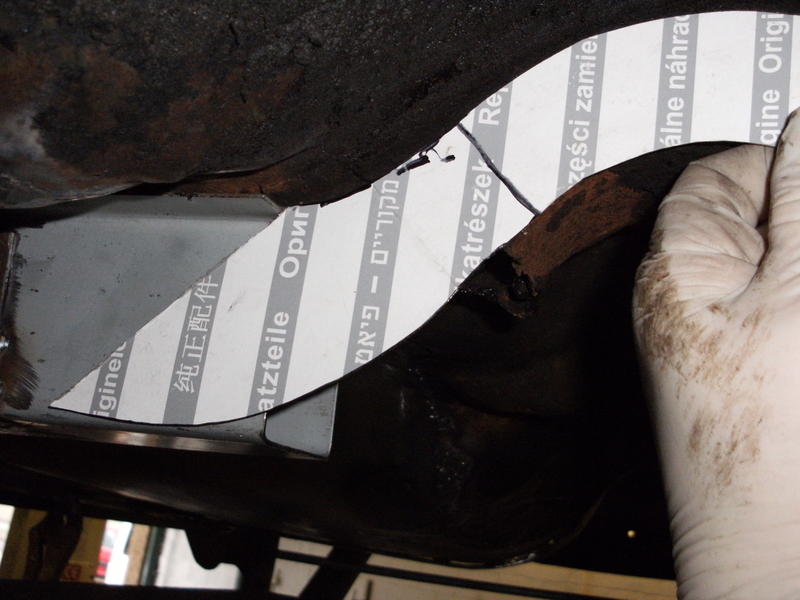 | Next we need to make a pattern (Using an Alfa Romeo Box) this is a simple profile of where the metal should go, note how the new chassis rail does not blend smoothly into the curve of the cardboard profile. |
|
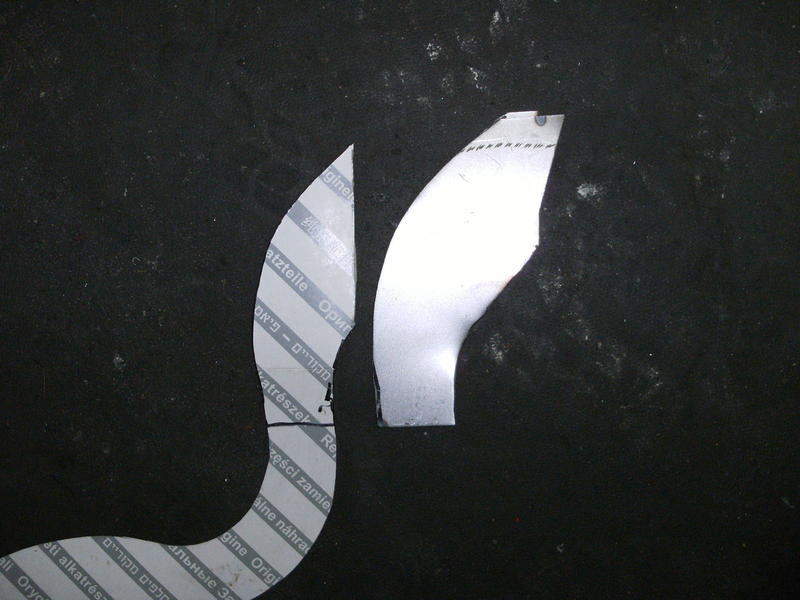 | Next we use the cardboard pattern to cut out the new steel plate |
|
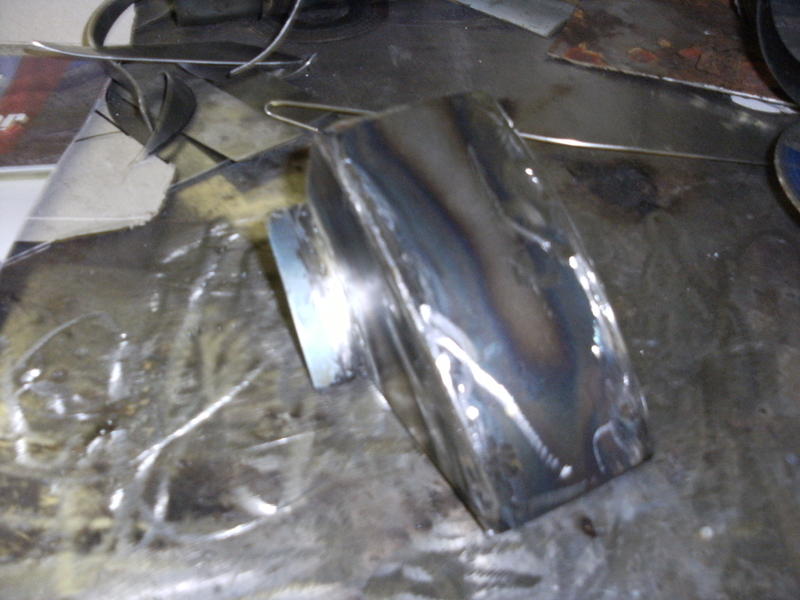 | We then use the same process to make the other two sides of the box section, once we have all three sides we fabricate the new box section off of the car. |
|
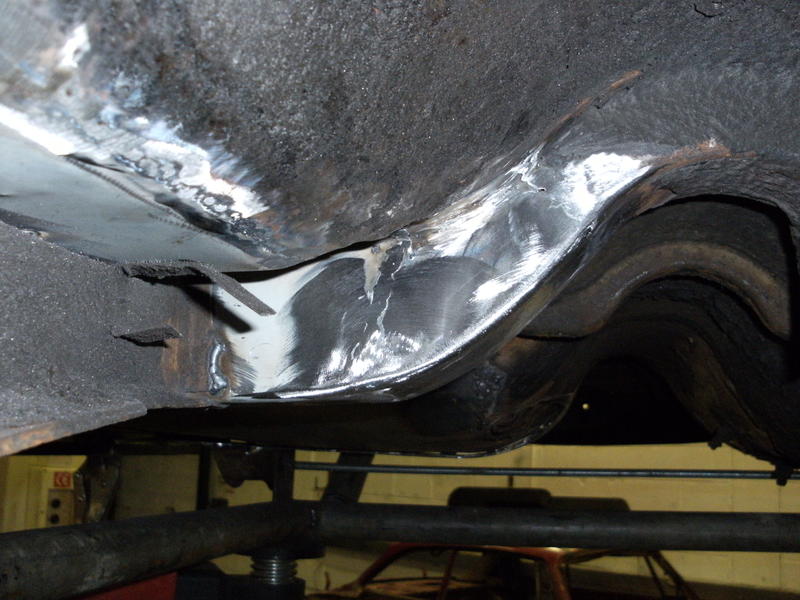 | Next the new chassis panel is welded into place, the box section it has been welded to has been re-profiled so that it blends seamlessly into our new panel. the welds are then dressed until they are smooth |
|
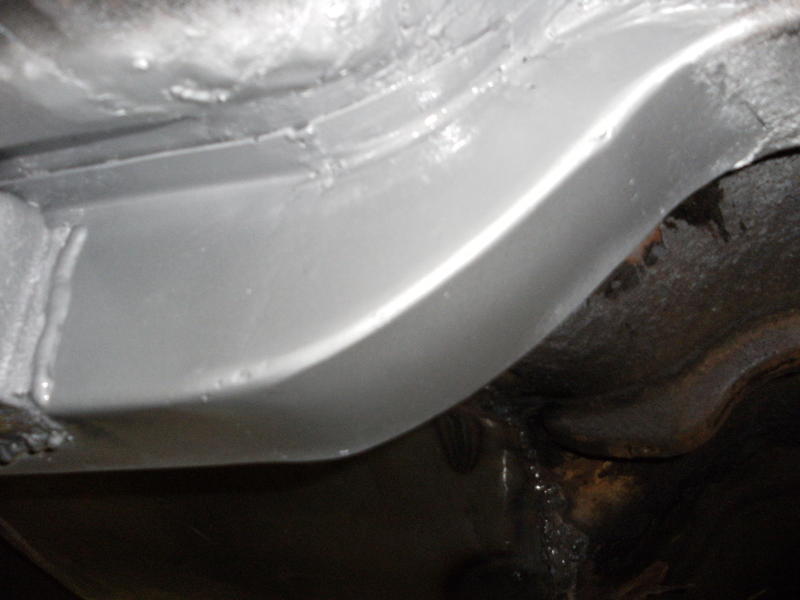 | A coat of primer and we are ready to move onto......... |
|
 | The next challenge! |
|