This page:


Replacing The Cam Belt On A Giulietta 1.6 or 2.0 Diesel engine
When replacing the cam belt on one of these puppies you need to replace the water pump as well. The timing belt is set up by the markings on the belt and the pulleys so no special tools are required. This 'How to' is based on the 1.6
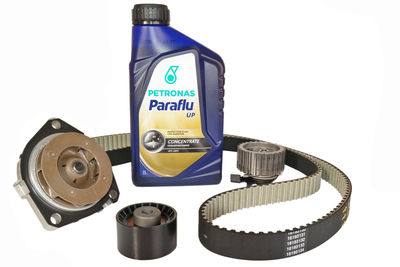
Cam belt kit 71754562, water pump 55269148
and coolant 16811616
Workshop time: 3 hours 30 mins
If you would like to book your Giulietta into the workshop the price of this repair for the 1.6 JTDM is £400.00 or £400.00 for the 2.0 JTDM.
 | Pull off the engine cover and unclip the fuel line. |
|
 | Undo the x2 10mm bolts holding the expansion tank. |
|
 | To release the electric connector on top of the fuel filter lift up the yellow tab then squeeze the sides and slide out. |
|
 | To unclip the fuel connectors squeeze the orange and white clips then pull off. |
|
 | Slightly unscrew the cap on the coolant tank to release the pressure in the system then unclip the coolant hose and plug it with a bolt to stop leakage. |
|
 | Unclip the retaining clip securing the bottom hose and move the tank out of the way to the front of the vehicle. |
|
 | Undo the x2 10mm bolts to the fuel filter housing bracket and remove the housing. |
|
 | Down below the fuel filters housing seat is a 10mm nut to undo that holds the side cover in the wheel arch. |
|
 | Undo the x3 Phillips and x18 T30 (TORX) screws to the front undertray then the x4 10mm bolts and x2 Phillips to the rear undertray. |
|
 | Undo the x1 Phillip and x2 T30 screws to the wheel arch side cover.... |
|
 | ....and remove. |
|
 | Using a 15mm spanner on the auxiliary belt tensioner (pic 1) apply pressure clockwise to remove tension so that the auxiliary belt can be removed. Using a metal pin or nail you can lock the tensioner (pic 2) to gain access to the cam belt metal side cover otherwise unbolt the tensioner. |
|
 | Undo the x4 T45 bolts to the bottom pulley. |
|
 | Undo the 8mm bolt to the auxiliary belt idler.... |
|
 | ....and the x2 13mm bolts at the bottom of the cam belt side cover. |
|
 | Support the engine under the sump to take the weight off of the engine mounts. |
|
 | Pull of the top sound proofing cover (it's attached by velcro). |
|
 | Undo the x3 15mm bolts and x3 18mm nuts to the engine mount. |
|
 | Unclip the side wire to the plastic cam cover then undo the x7 T40 bolts. |
|
 | Undo the x4 15mm bolts to the metal side cover, that can now be removed. |
|
 | Using a spanner on the bolt head of the cam shaft pulley rotate clockwise until the timing mark on the pulley (pic 1) and bottom drive gear (pic 2) are roughly in position. |
|
 | Undo the 12mm cam belt tensioner, take off the old belt and undo the 15mm idler. |
|
 | The water pump is secured by x3 6mm allen bolts, you'll need to lay down a catch tray for the coolant. |
|
 | Apply a thin layer of silicone around the surface of the new water pump, lay on the gasket and bend over the securing tabs then ensuring the water pumps housing face is clean replace the water pump. |
|
 | Now you can replace the new cam belt kit. Tack the tensioner in place and do up the idler. |
|
 | Mark the side of the cam belt with tipex where the three timing lines are. The arrows on the belt indicate the direction that the belt runs (clockwise). |
|
 | The timing line that falls between the teeth on the cam belt aligns with the mark on the bottom driven gear. |
|
 | The timing line on the belt should match up with the marking on the cam shaft pulley. Rotate the pulley on the fuel pump (on the left) so it also aligns. |
|
 | Adjust the cam belt tensioner so that the circular indicator falls between the two prongs then tighten it up. |
|
Related Links: Servicing costs | EGR valve coolant housing replacement
